A Bread Bowl Recipe with a golden-brown crusty shell and a fluffy soft center is perfect for a homemade creamy soup. This artisan bread bowl pairs well with my cheesy broccoli cauliflower soup!! Fresh oven baked bread loaves smell amazing as they come out of the oven.
These homemade bread bowls are mini crusty round loaves of bread that you won’t be able to get enough of. Have you ever wanted Panera bread bowls at home?

This is an easy copycat Panera bread bowl that you can have at home. My soup bread bowls are a 5 stars recipe that you will be making again and again!!
Learn how to make this easy bread bowls recipe with my step-by-step instructions that tastes out of this world!!
This post may contain affiliate links. Read my privacy and terms of use policy.

What Water Temperature Should I Use for Making This Bread Bowl Recipe?
The perfect water temperature for making this homemade bread bowls recipe is between 100°F and 110°F. If the water is too cold, the yeast will take much longer to ferment properly.
If the water is too hot (140°F or higher), the yeast will be killed and not ferment at all. I like to use my Taylor Digital Thermometer to get the right warm water temp.
Warm water works best. The warm water should be between 100°F and 110°F.
Test warm water on your inner wrist if you do not have a digital thermometer.
How to Make Bread Bowls
Gather the ingredients to make this homemade bread bowls recipe. In a small bowl, add ½ teaspoon of the sugar with the active dry yeast and top with the warm water (100°F -110°F).
Stir to dissolve the yeast and then cover with a kitchen towel. The yeast mixture will become foamy if it is working properly.
The temperature of the water is important because if it is too hot the yeast will enter the kill zone, but if the water is too cold, the yeast will take much longer to ferment.
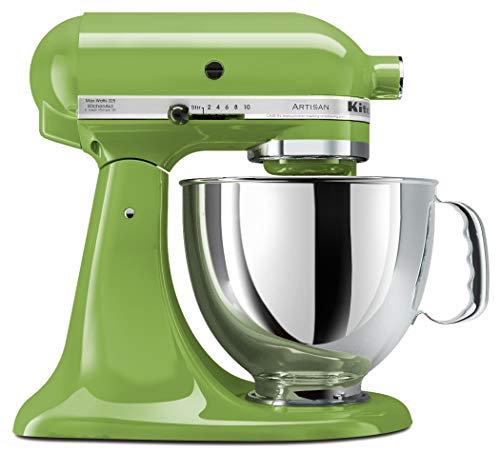
Using a KitchenAid stand mixer fitted with the bread dough hook on low speed or mix by hand in a large mixing bowl, add 4 cups of the all purpose flour, salt, 2 tablespoons of sugar, butter, and the yeast mixture.

Mix to combine all ingredients. Once combined, add more of the flour, 1 cup at a time, and continue mixing.

Scrape the sides of the bowl if needed. When the bread dough starts to come away from the sides of the bowl, it is ready to knead.
I added about 7 ½ cups of total flour to this dough recipe.

Knead the Bread Bowl Dough
Continue to use the KitchenAid stand mixer with the dough hook attachment on low speed or use your well-floured hands. Knead the dough for about 5 minutes which helps the gluten in the flour work together.
To test if the dough is kneaded enough, use clean hands, and pinch the dough between two of your fingers. If the dough hardly sticks to your fingers, it is ready for the next step.
But, if the dough is sticky, add the remaining flour and continue to knead for about 3 more minutes.

Bread Bowls – First Proofing
In a large clean bowl, spray the inside with cooking spray. Scrape the dough out of the mixing bowl.

Form the kneaded dough into a ball, set into the greased bowl and cover the bowl with a clean towel. Let the dough rise in a warm area for about 30 to 45 minutes. Rise until doubled in size.
Shaping the Easy Homemade Bread Bowls
First, punch down the dough by poking with your fingers to release built up air. Line two baking sheets with parchment paper.
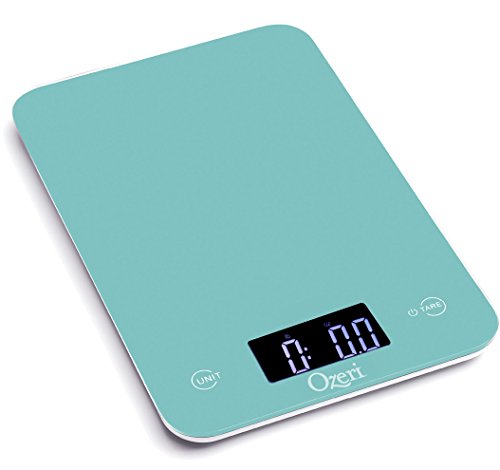
Divide the dough into 8 equal pieces. I use a kitchen scale for this job which makes it super easy. Each dough ball will weight about 8.5 ounces.

Scissors work great for cutting the dough into smaller pieces. Use greased hands and greased scissors.
Use a lightly floured surface if needed. With one of the individual small dough balls cradled in both hands, fold the dough ball into the center to make a smooth ball.


Place the smooth ball with the folded seam down onto the parchment paper lined baking sheet. Four homemade bread bowls dough balls per baking sheet.

With a serrated or sharp knife, score an “X” on the top of all the dough balls. Create the egg wash by whipping together the egg white with the one tablespoon of milk.

Using a pastry brush, brush with egg wash to coat the dough ball with a thin layer of the egg mixture. When you brush with egg wash, this will create a nice crust on the finished bowls.

Cover the dough balls with a clean kitchen towel. Let rise and let the dough rest.
Second Proofing – Bread Bowls
Place the covered sheet pans in a warm place. Let the dough balls rise until they have doubled in size.
Watch them closely. Proofing should take about 30 – 40 minutes but will vary depending on the temperature around the bread bowls.
How to Bake Bread Bowls
After proofing the dough balls for about 20 minutes, preheat oven to 400°F. Remove the cloth cover from the proofing dough balls.
Carefully, place the baking sheet into the preheated oven. Bake the homemade bread for about 25 to 30 minutes.
The outside crust of the bread bowls should be a deep golden-brown color. Remove from the oven and allow the bread bowl to completely cool before using them.

How to Cut a Bread Bowl
With a sharp knife or a serrated knife, cut a 2-inch circle on the top of the bread bowl. Carefully, pull the golden-brown crusted circle lid up and cut the soft bread off.
Remove as much of the white bread from the inside of the bowl as desired. I like to leave a little layer of white bread in the bowl to help soak up the soup.
What to Serve in a Baked Bread Bowl
Homemade baked bread bowls tastes wonderful when filled with thicker soups such as cheesy broccoli cauliflower carrot soup, cheddar cheese beer soup, slow cooker butternut squash soup, and black bean chili. Once filled with warm soup, make sure to serve immediately. Another great soup to serve in a bread bowl in this chicken gnocchi soup. Yummy!!!
If you are looking for something other than soup to fill your bread bowls, try this Mac and cheese bread bowl and this Cheese and Bacon Cob Loaf recipe.

How to Store Baked Bread Bowls
Store leftover bread bowls by placing a loose plastic wrap around them. These crusty bread loaves will last about 5 days but are best served within a couple of days.
How to Freeze Baked Bread Bowls
These Homemade Bread Bowls freeze very well, but not for more than 2 months. Once the bread bowls are baked, wrap each bowl tightly with plastic wrap.
Place into a Ziplock bag, label, and date the bag. Freeze for up to two months.
When ready to use, pull the desired number of bread bowls from the freezer and allow to thaw for 2 hours before using. If desired, microwave the bowls for 30 seconds right before use to warm them up.

Sour Dough Bread Bowls
Do you want to jump on the sour dough starter band wagon? Make this sourdough starter and then you can turn it into sour dough bread bowls.
Bread Bowls Recipe – FAQ
If you decide not to make your own homemade bread bowls, then consider buying them. Visit your local bakery and ask if they make bread bowls. This might not be one of their everyday items but something that is a special order. Look at your local grocery store. My local Meijer Super Center offers a package of sourdough 8-ounce bread bowls for $3.29 each.
Yes, Panera Bread sells their famous bread bowls!! You can buy just a bread bowl for $2.69 (in 12-13-21). If several bowls are desired, it is best to call a couple of days ahead to pre-order them.
As of December 13, 2021, a bread bowl from Panera Bread costs $2.69. Order them from the panerabread.com.
The best bread for a great bread bowl is having a good golden-brown crust on the outside and a super soft fluffy white center. A good Italian bread works great.
Bread Bowls Recipe
Get the full recipe and nutrition facts below.
How to Make a Bread Bowl

A Bread Bowl Recipe with a golden-brown crusty shell and a fluffy soft center is perfect for a homemade creamy soup. This artisan bread bowl pairs well with my cheesy broccoli cauliflower soup!!
Ingredients
- Yeast Mixture
- Sugar, Granulated 1/2 teaspoon
- Yeast, Active Dry 1 1/2 Tablespoons
- Water, Warm 3 cups
- Dough Mixture
- Flour, All Purpose 7 1/2 to 9 cups
- Salt, Table 1 Tablespoon
- Sugar, Granulated 2 Tablespoons
- Butter, Melted 4 Tablespoons
- Egg Wash
- Egg, White 1 each
- Milk 1 Tablespoon
Instructions
- Gather the ingredients to make your homemade bread bowls.
- In a small bowl, combine ½ teaspoon of the sugar with the active dry yeast. Top with the warm water (100°F -110°F).
- To dissolve the yeast, stir to mix, and then cover with a loose kitchen towel. The yeast mixture will become foamy as it is working. The temperature of the water is important because if it is too hot the yeast will enter the kill the yeast, but if the water is too cold, the yeast will take much longer to work properly.
- Using a KitchenAid Mixer fitted with the dough hook on low speed or mix by hand in a large bowl, add 4 cups of the flour, salt, 2 tablespoons of sugar, butter, and the yeast mixture.
- Mix on low to combine all ingredients. Once combined, add more of the all purpose flour, 1 cup at a time, and continue mixing.
- When the bread dough starts to come away from the sides of the bowl, it is ready to knead. I added about 7 ½ cups of the all purpose flour to this dough recipe.
- Knead the Bread Bowl Dough
Continue to use the KitchenAid mixer with the dough hook on low speed or use your well-floured hands. Knead the dough for about 5 minutes which helps the gluten in the flour work together. - Test if the bread dough is kneaded enough by using clean, dry hands, and pinch the dough between two of your fingers. If the dough hardly sticks to your fingers, it is ready for the next step. But, if the dough is sticky, add more all purpose flour and continue to knead for about 3 more minutes.
- Bread Bowls - First Proofing
In a large bowl, spray the inside with cooking spray. Place the shaped dough ball into the well greased bowl and cover with a clean towel. Let the bread dough rise for about 30 to 45 minutes until it has doubled in size. - Shaping the Bread Bowls
First, punch down the dough by poking with your fingers to release built up air. - Line two baking sheets with parchment paper and set aside.
- Divide the homemade dough into 8 equal pieces. I use a scale to do this job properly which makes it super easy. Each homemade dough ball will weight about 8.5 ounces. Greased scissors work great for cutting the dough into smaller pieces. Use greased hands and greased scissors.
- With one of the individual small dough balls placed in both hands, fold the dough into the center bottom to make a smooth ball.
- Place the smooth dough ball with the folded seam down onto the parchment lined baking sheet.
- Four bread bowl balls will fit on each pan.
- With a serrated or sharp knife, mark an “X” on the top of all the dough balls.
- Create the egg wash by whipping together the egg white with the one tablespoon of milk in a small bowl.
- Use a pastry brush and gently coat the whole dough ball with a thin layer of the egg wash. Loosly cover the homemade dough balls with a clean towel.
- Second Proofing – Bread Bowls
Place the covered sheet pans in a warm place to aid in the proofing process. Let the homemade dough balls rise until they have doubled in size. Watch them closely. Proofing should take about 30 – 40 minutes but will vary depending on the temperature around the bread bowls. - Baking the Homemade Bread Bowls
As the dough balls are doubling in size, preheat the oven to 400°F. - Remove the cloth from the proofing dough balls.
- Carefully, place the baking sheet pans into the preheated oven. Bake the homemade bread bowls for about 25 to 30 minutes. The outside of the bread bowls should be a deep golden-brown color. Remove from the oven when fully cooked and allow the bread bowls to completely cool before using them.
Notes
Use a knife to cut a 2 inch hole in the top of the bread bowl and scoop out the inside bread to be able to fill with soup.
Store leftover bread bowl in an airtight container for up to 6 days.
Freeze bread bowls for up to 2 months by wrapping in plastic wrap and then a Ziplock bag.
Recommended Products
As an Amazon Associate, I earn from qualifying purchases. This page contains affiliate links. Click on the highlighted text in a post to explore a product. If you purchase through one of them, I will receive a commission (at no additional cost to you). I ONLY EVER ENDORSE PRODUCTS THAT I TRULY LOVE. Thank you for your support!

Nutrition Information
Yield
8Serving Size
1Amount Per Serving Calories 468Total Fat 7gSaturated Fat 4gTrans Fat 0gUnsaturated Fat 11gCholesterol 39mgSodium 998mgCarbohydrates 824gFiber 30gSugar 4gProtein 112g
Note: For exact nutritional information, consult your dietitian. All nutritional information is simply a guideline.
Did you enjoy this recipe? Your comment and 5-star rating take just seconds but helps other readers and helps our site gain more readers! Thank you for taking the time to share your comments!
Stay in touch with me through social media!
Tried this recipe? Snap a picture and tag #frommichigan2019 on Instagram @frommichigan2019.
Join my Blackstone Griddle Facebook Pages:
Subscribe to my YouTube channel – Sherry Ronning – to get notification of my latest videos.
If you enjoy this recipe, you may like the following: Cheesy Broccoli Cauliflower Soup & Black Bean Chili


Bread bowls with spinach dip were my FAVORITE when I was younger! These look so soft.
These bread bowls are super soft but hold up well with creamy soups. I think you have given me a new idea for a recipe! Love the spinach dip in a bread bowl idea!!
I can’t wait to make these bread bowls – which soup would you recommend in them?
My family loves these bread bowls and they request my cheesy broccoli cauliflower soup all the time!!
This homemade bread bowl recipe looks absolutely delicious! The step-by-step instructions and tips for getting the right water temperature for the yeast are really helpful. I love the idea of serving a creamy soup in a fresh, warm bread bowl – it’s the perfect comfort food for a chilly day.
This bread bowl recipe IS THE BEST!!
I have the Tailgater to Go, with the grilling side and griddle side. Both with hinged lids. Can I bake these (and other breads) on it?
Yes, you should be able to bake on your griddle and use the lid as your dome lid. Here is my post about baking on the griddle. https://frommichigantothetable.com/small-batch-cookies/ – How to Make Blackstone Cookies. If you like YouTube, here is a video that I made:
https://youtu.be/KON54wXv0kE – 10 Tips for Baking on the Blackstone Griddle.
I hope this helps! Happy griddle baking!!