I have learned how to grease a pan or two, being a professional baker for more that 20 years. I typically use my own homemade pan grease. This simple easy recipe has made my life so much easier!!

Make ahead of time and store in the refrigerator for whenever you need to grease a pan. Three pantry ingredients are all it takes to make this pan grease recipe and only 5 minutes to whip up. Just remember, equal amounts of 3 simple ingredients: flour, shortening and vegetable oil.
A low-cost alternative to what is on the market with an incredibly long shelf life. Pan grease and cake release are the same thing, just a different name. The both keep your cakes from sticking!!
If you bake a lot of cakes, you will want to print this recipe. There is nothing worse than creating the perfect cake and having it ruined because it stuck to the side of the pan. This cake release recipe will eliminate all of those cake-flipping disasters!
This post may contain affiliate links. Read my privacy and terms of use policy.
Pan Grease Ingredients
- Flour
- Shortening
- Oil

How to Make Your Own Pan Grease
Gather Your Ingredients: Prepare equal parts flour, shortening, and vegetable oil (for example, 1 cup of each).
Mix the Ingredients: In a mixing bowl, combine the flour, shortening, and oil. Using an electric hand mixer or a KitchenAid stand mixer with a wire whip attachment, start on low speed until the ingredients come together.
Whip Until Fluffy: Gradually increase to high speed and beat for 5–10 minutes until the mixture is light, fluffy, and smooth.
Store Properly: Transfer the mixture to a sealed container and store in the refrigerator. Your pan grease will last for 6–12 months.
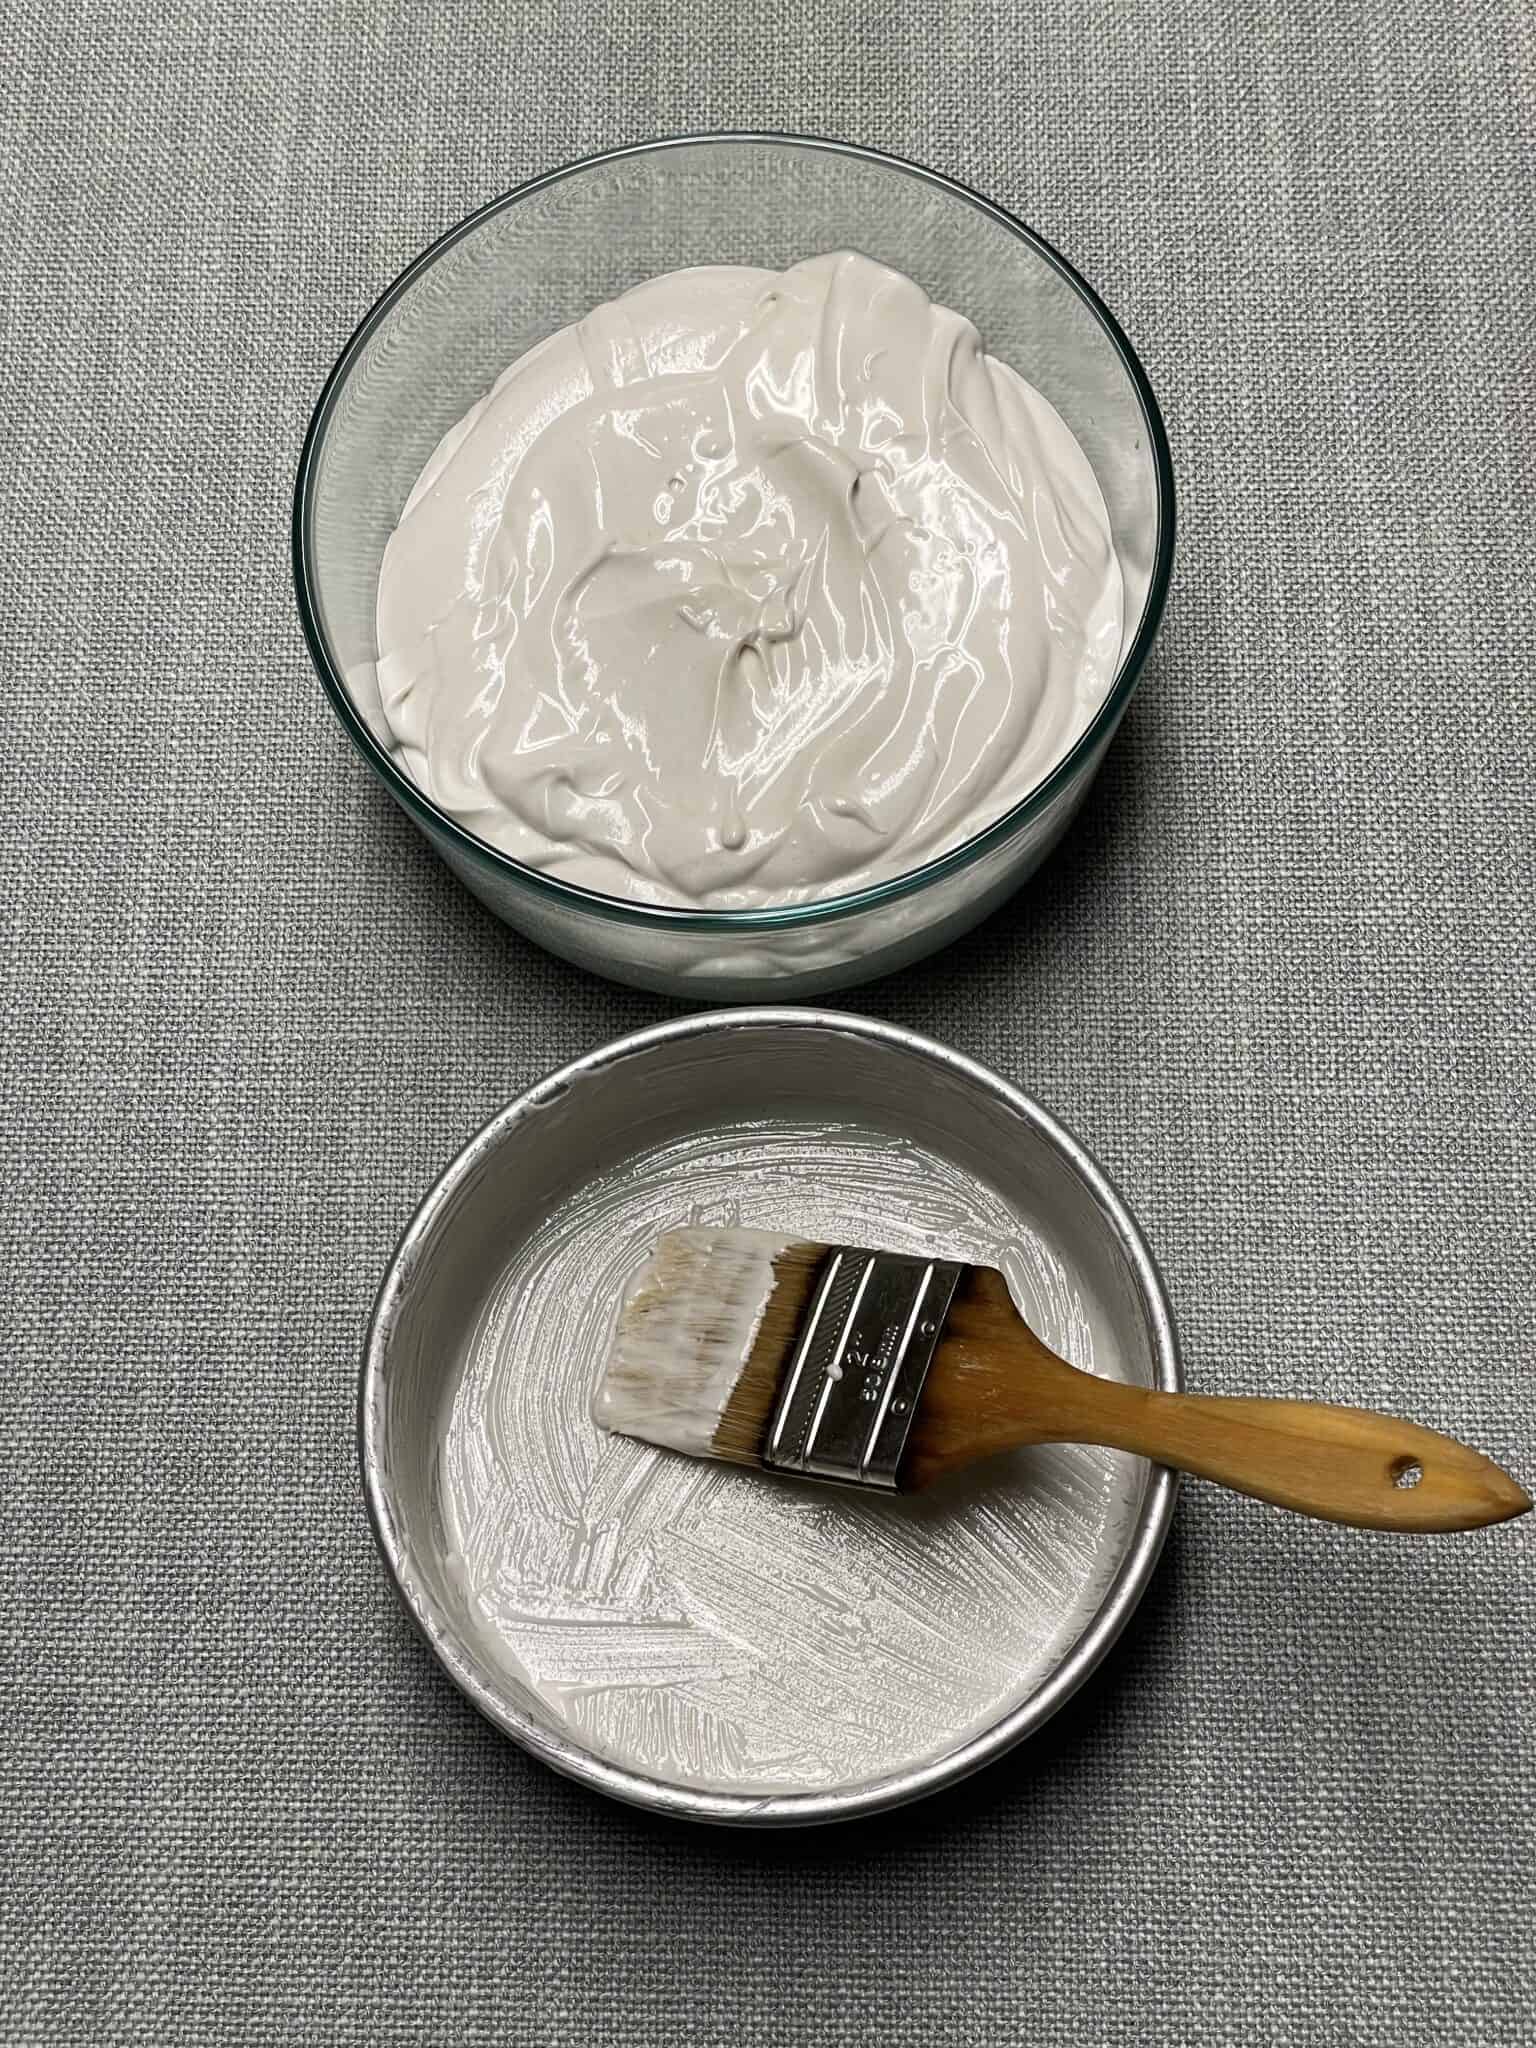
Apply with a Pastry Brush: When ready to use, let the grease soften for a few minutes. Use a pastry brush to coat your pan evenly. Make sure to get in the corners and all the way to the top of the sides of the pan.


How to Grease a Pan
- Soften the Grease: If your homemade grease is stored in the fridge, set it out for a few minutes so it’s easier to spread.
- Choose Your Tool: A pastry brush works best for applying the grease. Dedicate one brush just for greasing pans to avoid stray bristles in your batter. After each use, wrap the brush in a plastic bag and store it in the fridge with the grease mixture. 👉 Tip: Don’t have a pastry brush? A folded paper towel wrapped around your fingers works too—just toss it after use.
- Apply Generously: Brush a thick, even layer of grease over the entire inside of the pan—especially in the cracks, corners, and crevices where cakes tend to stick.
- Coat Evenly: Make sure the bottom and sides of the pan are fully covered. The goal is a smooth, even layer with no bare spots.
- Bake with Confidence: Your pan is now perfectly prepped! Pour in your cake batter and bake as usual. When cooled, your cake will release easily, leaving you with smooth edges—perfect for decorating or frosting.


How to Grease and Flour a Pan
Back in my teenage baking days, every recipe book seemed to say the same thing: “Grease and flour your cake pans.”
I quickly grew to dislike this method. It was messy, left a powdery residue on the finished cake, and honestly made cleanup a headache. That frustration pushed me to find an easier alternative—and that’s when I discovered my homemade cake release recipe. A cake made with pan grease.

How to Grease a Pan for Brownies
When it comes to brownies, my go-to is simple: cooking spray.
Spray your brownie pan (or muffin and loaf pans if you’re making quick breads), and you’re good to go. It’s quick, easy, inexpensive, and gives consistent results.
I don’t use my homemade cake release for brownies or quick breads—cooking spray works perfectly, and if it isn’t broken, there’s no reason to fix it!

Frequently Asked Questions
When it comes to baking, I get asked a lot of questions about greasing pans and making homemade cake release. To help you out, I’ve put together answers to some of the most common questions that bakers (both beginners and pros) often ask.
At my bakery, I often use a quick and reliable method with cooking spray and parchment paper. Start by lightly spraying the pan with cooking spray. Then, place a piece of parchment paper on the bottom of the pan and press it down to create a tight seal. Finish by spraying another generous layer of cooking spray over the parchment and along the sides of the pan. This ensures your cakes release cleanly every time.
I prefer to store my homemade pan grease in the refrigerator, especially since I make large batches for my bakery. Properly stored in a sealed container, it will last 6 months to a year. If the mixture separates, simply let it come to room temperature and stir to bring it back together. While it can be stored at room temperature, keeping it in the fridge helps it last longer and stay fresh.
Yes! Pan grease freezes well if you want to extend its shelf life. Store it in an airtight container and thaw it in the refrigerator before use. Give it a good stir once it reaches room temperature to bring back the fluffy consistency.
Absolutely. Homemade pan grease (also known as cake release) provides a more even and reliable coating than cooking sprays. It also works especially well for intricate pans with lots of crevices, preventing sticking and giving cakes smooth, clean edges. Plus, you know exactly what’s in it—no added chemicals or propellants.
Pan Grease
I have learned how to grease a pan or two, being a professional baker for more than 20 years. I typically use my own homemade pan grease. This simple easy recipe has made my life so much easier!! Make ahead of time and store in the refrigerator for whenever you need to grease a pan. Three pantry ingredients are all it takes to make this pan grease recipe and 5 minutes to whip up.
Ingredients
- Flour, All Purpose 1 cup
- Shortening 1 cup
- Oil, Vegetable 1 cup
Instructions
- Gather all of your ingredients.
- Combine the flour, shortening, and oil in a mixing bowl.
- Mix with an electric hand mixer or a KitchenAid Stand mixer using a wire whip attachment. Start on low and beat until the mixture is combined. Gradually, turn the mixer speed up until you reach high speed.
- Beat until the mixture is light and fluffy. This step will take 5 to 10 minutes depending on your mixer.
- Use a pastry brush to apply to the bottom and sides of the pan.
- Store any un-used pan grease in a sealed container in the fridge for 6 to 12 months.
Recommended Products
As an Amazon Associate, I earn from qualifying purchases. This page contains affiliate links. Click on the highlighted text in a post to explore a product. If you purchase through one of them, I will receive a commission (at no additional cost to you). I ONLY EVER ENDORSE PRODUCTS THAT I HAVE PERSONALLY USED. Thank you for your support!


Nutrition Information
Yield
48Serving Size
1Amount Per Serving Calories 52Total Fat 5gSaturated Fat 2gTrans Fat 0gUnsaturated Fat 3gCholesterol 2mgSodium 1mgCarbohydrates 2gFiber 0gSugar 0gProtein 0g
Note: For exact nutritional information, consult your dietitian. All nutritional information is simply a guideline.
Did you enjoy this recipe? Your comment and 5-star rating take just seconds but helps other readers and helps our site gain more readers! Thank you for taking the time to share your comments!
Stay in touch with me through social media!
Tried this recipe? Snap a picture and tag #frommichigan2019 on Instagram @frommichigan2019.
Join my Blackstone Griddle Facebook Pages:
Subscribe to my YouTube channel – Sherry Ronning – to get notification of my latest videos.
German Chocolate Frosting
My German Chocolate Cake is made with my pan grease. Doesn’t it look so beautiful!!

